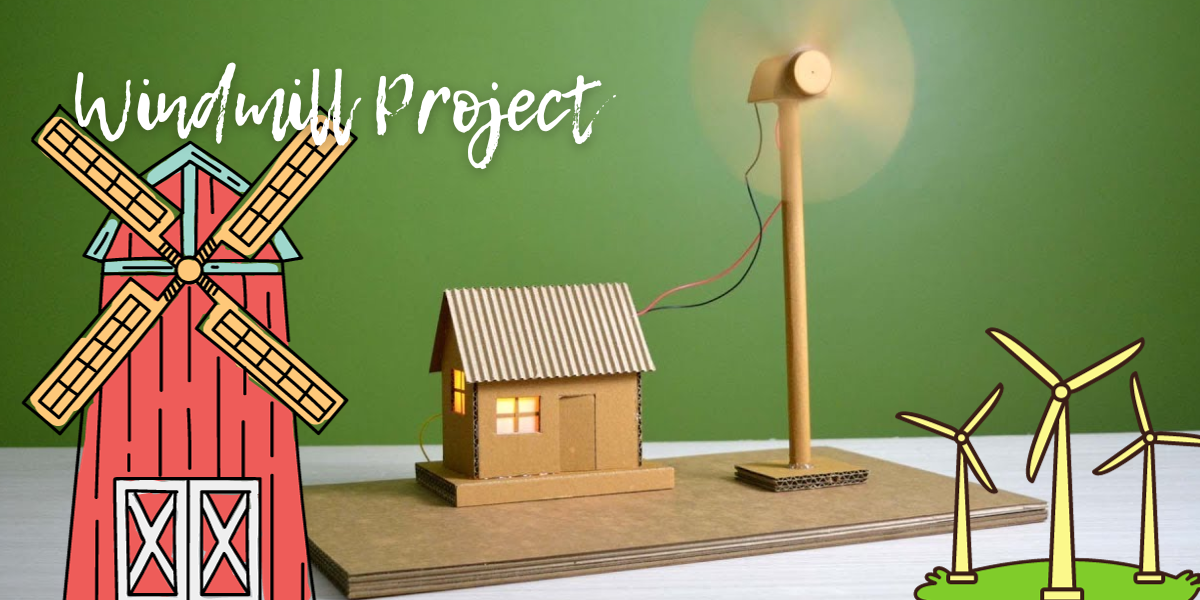
The Working Model of Windmill Project is a simple yet engaging science project that students frequently do in exhibitions. Windmills are devices that use rotation to transform wind energy into workable energy. Windmill blades typically rotate in a clockwise manner. The goal of this windmill project is to teach students about energy transfer from one form to another. A windmill’s rotation frequently powers a motor or generator, which produces electricity or mechanical work.
Windmill Project
The use of wind power to convert an object’s rotation into productive energy and work extends originally from 1st century Greece, and wind wheels were extensively recorded in 7th century Persia. Daniel Halladay of the United States designed the first proper windmill in 1854. Windmills are classified into two categories based on their axis of rotation:
- Windmills with a vertical axis
- Windmills with a horizontal axis
Horizontal axis windmills are classified into four types: post mills, smock mills, tower mills, and fan mills. A windmill model is an excellent craft science project for students. In the following section, we will learn more about how to construct the windmill project.
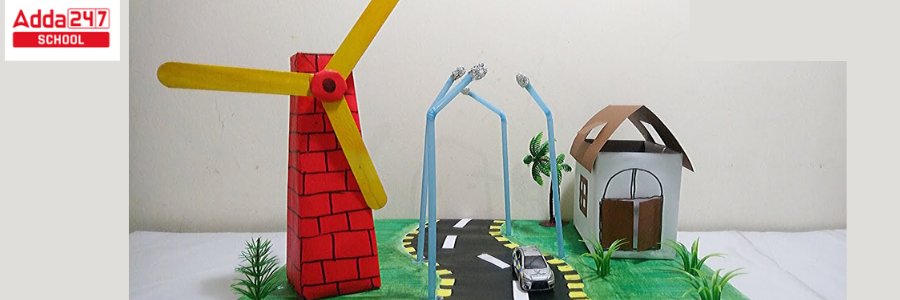
Windmill Project for Kids
The Working Principle of Windmill Project for Kids – A windmill is a large structure with sails interconnected by a fixed spinning motor. The spinning gear turns these blades, which assist in converting wind kinetic energy into electricity. When the wind blows across the windmill’s moving blades, the generator connected to the windmill generates power. And that energy/electricity can be used in any type of work.
Windmill Science Project
Windmills are an excellent example of a wheel-and-axle machine. The wheel is able to spin on an axis, using the wind’s energy to propel it by using sails, or shapes that can capture the wind. Science projects, as well as other types of projects, help youngsters to learn while creating something new. When constructing a windmill project, students may make the unintentional mistake of connecting a motor fixed with a fan to a battery cell, resulting in a fan that runs on a battery rather than a windmill. Read the windmill science project instructions properly while making the model.
Materials needed for Windmill Science Project
- Plastic fan motor (6 volts or higher)
- LED Resistor
- Motor mounting pole made of wood
- Board of wood
- Wire for connecting
- Cello tape
Instructions
Step 1: At first attach the motor to the wooden pole or whatever material you’re using to build the pole.
Step 2: Check that the motor is securely fastened using cello tape.
Step 3: Next, secure the pole to the wooden plank or other base support material. (We chose the ply board because it is durable and readily accessible)
Step 4: Remove the insulation from the connected wire and cut it into two pieces.
Step 5: Attach the resistor to the motor’s terminal one of the cables that connect to the resistor and the additional wire to the terminal.
Step 6: Mount LED terminals to the ends of the connected wire.
Observation
You have successfully completed your windmill project. Simply rotate the fan at a high speed to generate electricity. Then observe if the LED illuminates.
Windmill Project Explanation
Let us analyze the logic behind windmill project electricity generation. here we give detailed explanation of windmill project
- Because of the aerodynamic airfoil design, the blades feel lift when the wind goes across them. The blades rotate and begin to rotate as a result of the lift produced.
- When the wind direction changes, the yaw unit points it in the direction of the incoming wind. The rotation of the blades is conveyed to the generator, which generates energy, via the gear train and couplings.
- The electricity is then routed through wires to storage batteries or right into the power grid.
Windmill Project for School Kids Explanation
A windmill project for school is a fun way to learn about renewable energy, engineering, and the conversion of wind energy into mechanical or electrical energy. Here’s a simple explanation for a school-level windmill project:
Objective:
The goal of the windmill project is to demonstrate how wind energy can be harnessed and converted into usable mechanical or electrical energy.
Materials:
Cardboard or plastic sheets (for blades)
A wooden stick or pencil (for the windmill’s shaft)
A small motor (if you’re generating electricity)
A small LED light or a fan (for demonstration)
Glue or tape
Scissors
A base (like a wooden board or a box) to hold the windmill upright
Wires (if you’re using a motor)
A pinwheel (optional, if you are showing a simple windmill model)
Steps:
Create the Blades:
Cut 3-4 equally sized blades from cardboard or plastic. The blades should be slightly curved to catch the wind better.
Make the Rotor:
Attach the blades to the center of the windmill (the rotor). This will be the part that spins in the wind. A round piece of cardboard can act as a hub where the blades are glued.
Set up the Shaft:
Insert a wooden stick or pencil through the center of the rotor. This acts as the shaft and allows the rotor to spin freely. The shaft should be attached to the base so that it stands upright.
Attach the Motor (optional):
If you are demonstrating electricity generation, attach a small motor to the shaft. As the rotor spins, the motor will convert the mechanical energy into electrical energy.
Show Energy Conversion:
Connect wires from the motor to a small LED light or a fan. When the windmill spins, the motor will generate electricity to power the LED or fan.
Base and Stability:
Make sure the windmill is standing firmly on the base, so it can catch the wind or be blown by a fan for the demonstration.
Working Principle:
Wind Energy: The wind blows and causes the blades of the windmill to spin.
Mechanical Energy: As the blades spin, they turn the shaft, which is connected to a motor.
Electrical Energy (optional): The motor converts the spinning (mechanical energy) into electrical energy, which can power a small LED light or another device.
Explanation:
Windmills work on the principle of converting kinetic energy (energy from wind) into mechanical energy. Historically, windmills were used to grind grain or pump water, but modern wind turbines convert wind energy into electrical energy.
Conclusion:
This project illustrates how wind energy can be used as a clean, renewable source of power. By building this model, students can understand basic principles of energy conversion and sustainability.
Optional Enhancements:
Use a fan to simulate wind if you’re indoors.
Paint or decorate the windmill for presentation.
Add more features like a battery to store the generated electricity.
This project is a great way to learn about sustainable energy sources and how they can help reduce reliance on fossil fuel
How to Increase Windmill Speed?
We can attach a gearbox before the generator in order to achieve a fast speed ratio of 1: 90 (cut-off speed of 80 kmph). A brake is also installed in a nacelle to assist with wind arrest during windy circumstances. The generated electricity is then transported to the transformer located at the windmill’s base.
Wind Mill Project Uses
let’s understand the utilization of Windmills. The primary function of a windmill is to transform wind energy into electrical energy, and once this energy is obtained, wind mill project is used in the following ways:
- For groundwater pumping.
- Timber saw-milling
- Grain milling
- Drainage-pumping
- Extraction of oil from seeds
- Machining
- Commodity processing includes –
- Tobacco
- Cocoa Dye
- Stock-watering
- Paints and spices
Windmill Project for School PDF
Let’s Check Wind mill project for school kids. check now
Windmill Project for School PDF


 Best NEET UG Counselling Course 2026: Wh...
 Haryana NEET Counselling 2026: Registrat...
 Gujarat NEET Counselling 2026: Registrat...