
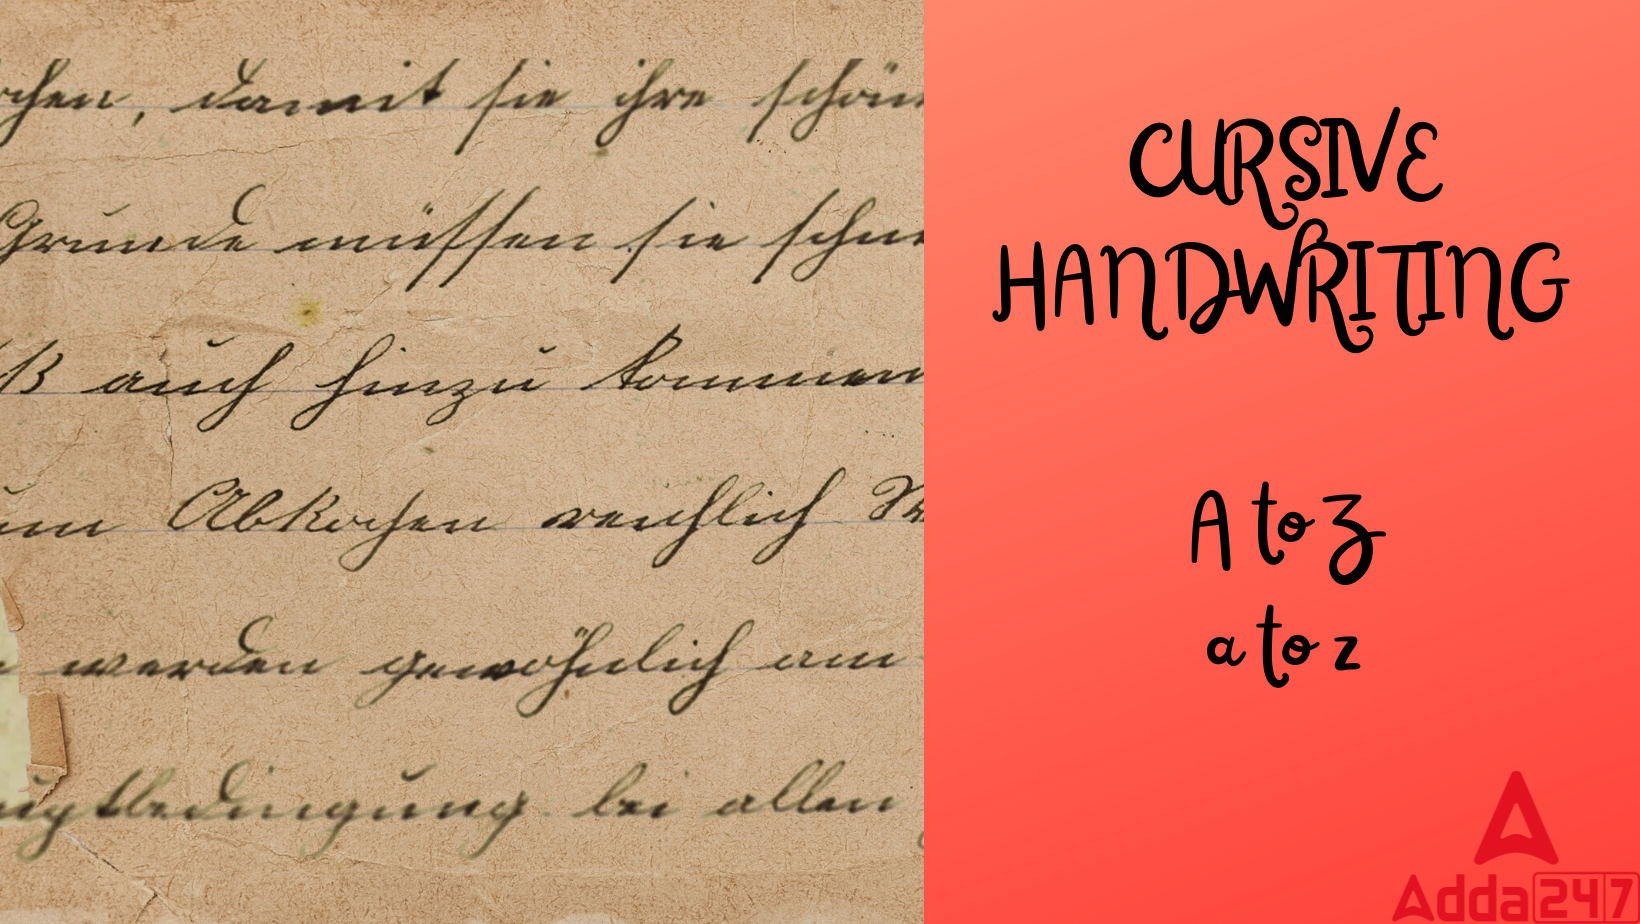
Cursive Writing
Cursive writing is a style of penmanship that involves connecting the letters in a continuous flow, creating a smooth and elegant script. It is often used for artistic purposes, signatures, and personal notes. Here’s an explanation of cursive writing from A to Z:
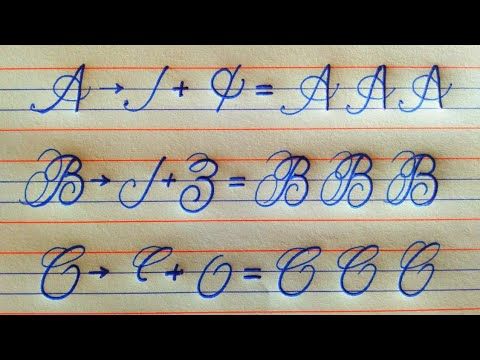
A – Start with a small upward stroke from the bottom line, curving it to the left and slightly up. Then, make a gentle downward stroke to the bottom line, forming a rounded shape.
B – Begin with a small upward stroke from the bottom line, curving it to the left and upwards. Bring it back down and create a loop at the bottom line, then curve it back up to the middle line.
C – Start with a small upward stroke from the bottom line, curving it to the left and upwards. Make a larger curved stroke, almost like a half-circle, and finish it at the bottom line.
D – Begin with a small upward stroke from the bottom line, curving it to the left and upwards. Create a loop at the middle line and then bring it down to the bottom line, making a curved shape.
E – Start with a small upward stroke from the bottom line, curving it to the left and slightly up. Create a horizontal stroke, connecting it to the previous curve at the middle line.
F – Begin with a small upward stroke from the bottom line, curving it to the left and slightly up. Create a horizontal stroke, but this time stop at the middle line without connecting it to the previous curve.
G – Start with a small upward stroke from the bottom line, curving it to the left and upwards. Make a larger curved stroke, almost like a half-circle, and then swing it back towards the middle line and extend it a bit.
H – Begin with a small upward stroke from the bottom line, curving it to the left and upwards. Create another vertical stroke starting from the top line and bring it down to the bottom line.
I – Start with a small upward stroke from the bottom line, curving it slightly to the left. Make a simple vertical line connecting the bottom line to the top line.
J – Begin with a small upward stroke from the bottom line, curving it to the left and upwards. Create a loop at the middle line and then extend it downwards, finishing with a small hook.
K – Start with a small upward stroke from the bottom line, curving it to the left and upwards. Then, create a diagonal stroke from the top line to the bottom line, meeting the previous curve.
L – Begin with a small upward stroke from the bottom line, curving it to the left and upwards. Make a simple vertical line connecting the bottom line to the middle line.
M – Start with a small upward stroke from the bottom line, curving it to the left and upwards. Create a diagonal stroke going down to the bottom line, then swing it back up to the middle line. Repeat the process to form two humps.
N – Begin with a small upward stroke from the bottom line, curving it to the left and upwards. Create a diagonal stroke going down to the bottom line, then swing it back up to the top line.
O – Start with a small upward stroke from the bottom line, curving it to the left and slightly up. Make a larger rounded stroke, almost like a full circle, and finish it at the starting point.
P – Begin with a small upward stroke from the bottom line, curving it to the left and upwards. Create a loop at the middle line, then swing it back and extend it downwards, finishing with a small hook.
Q – Start with a small upward stroke from the bottom line, curving it to the left and upwards. Make a larger rounded stroke, almost like a full circle, but extend it downwards, finishing with a small tail.
R – Begin with a small upward stroke from the bottom line, curving it to the left and upwards. Create a loop at the middle line, then swing it back and form a diagonal stroke towards the bottom line.
S – Start with a small upward stroke from the bottom line, curving it to the left and upwards. Make a larger curved stroke, but this time in the opposite direction, swinging it back towards the bottom line.
T – Begin with a small upward stroke from the bottom line, curving it to the left and slightly up. Create a horizontal stroke, connecting it to the previous curve at the top line.
U – Start with a small upward stroke from the bottom line, curving it to the left and slightly up. Make a larger rounded stroke, almost like a full circle, but stop at the middle line.
V – Begin with a small upward stroke from the bottom line, curving it to the left and slightly up. Create a diagonal stroke going up towards the top line, then swing it back down to the middle line.
W – Start with a small upward stroke from the bottom line, curving it to the left and slightly up. Create a diagonal stroke going down to the bottom line, then swing it back up towards the top line. Repeat the process to form two humps.
X – Begin with a diagonal stroke from the top left corner to the bottom right corner, crossing the middle line. Then, create another diagonal stroke from the top right corner to the bottom left corner, crossing the previous stroke.
Y – Start with a small upward stroke from the bottom line, curving it to the left and slightly up. Create a diagonal stroke going up towards the top line, then swing it back down to the middle line. Finish with a small hook.
Z – Begin with a horizontal stroke from the top left corner to the top right corner. Then, create a diagonal stroke from the top right corner to the bottom left corner.
Cursive Writing A to Z
The letters of cursive writing are connected together in a continuous flow and learning to write beautifully in cursive is enjoyable and is seen to be a disappearing talent. But, it is common in schools to learn cursive writing to make the children’s handwriting smooth and beautiful.
Cursive Writing ABCD
A kind of joined-up handwriting known as cursive connects the letters to make writing faster. Block letters, where you raise the pen between each letter, are replaced by this. Additionally known as joined-up handwriting. It is less frequently referred to as script handwriting.
A to Z Cursive Writing
These days, a frequently asked question is, “Is cursive writing important to children?” Yes, it is the answer. For students to learn, practising the cursive letters from A to Z on worksheets is crucial. Learning and practising cursive writing is a crucial component of a child’s educational experience in today’s tech-based learning environment. Children who practise writing the uppercase A–Z in cursive get good hand grip and hand-eye coordination. Additionally, young children find it much simpler to learn the A to Z little letters of cursive writing. You can provide them with printable cursive letter A to Z worksheets or cursive writing A to Z capital and small letters pdf so they can practise.
Must read: Rhyming Words, List, In The English & Hindi
How to write cursive writing abcd in 4 lines?
This given picture will show you to write cursive letters in 4 lines
Cursive Writing A to Z- Tips to write
- When learning to write in cursive, always start with lowercase letters.
- Download practice writing in cursive. and then recreate the letters by tracing them.
- Try duplicating or tracing capital letters once you’ve mastered lowercase cursive writing.
- When combining the letters, keep everything tidy.
- Early font selection allows attention to be placed on a particular style of cursive writing.
- It is wise to practise writing in cursive every day for at least 20 minutes.
- Before tackling more difficult letters, practise simple ones like O or U since they only require one penstroke.
- Don’t go excessive. Don’t write too quickly. Spend some time crafting excellent writing.
- Don’t stretch your writing muscles. It is not necessary to exert a lot of pressure. This is a common error people make when learning to write in cursive. When using stencils to write in cursive, keep them loose.
- Exercise your body by moving to improve your cursive writing skills.
- Keep in mind that handwritten text is much more personal than text typed on a computer.
- Make use of lined paper. It is significantly superior for all writing forms, but especially for cursive.
- Even if the lined paper is impossible to own, nothing terrible will happen. Print some lined paper or use blank paper.
- To simplify your work and keep everything organized, keep all practice sheets in a file or binder. This facilitates learning.
Also read: Opposite Words- In English And Hindi
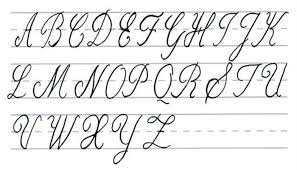
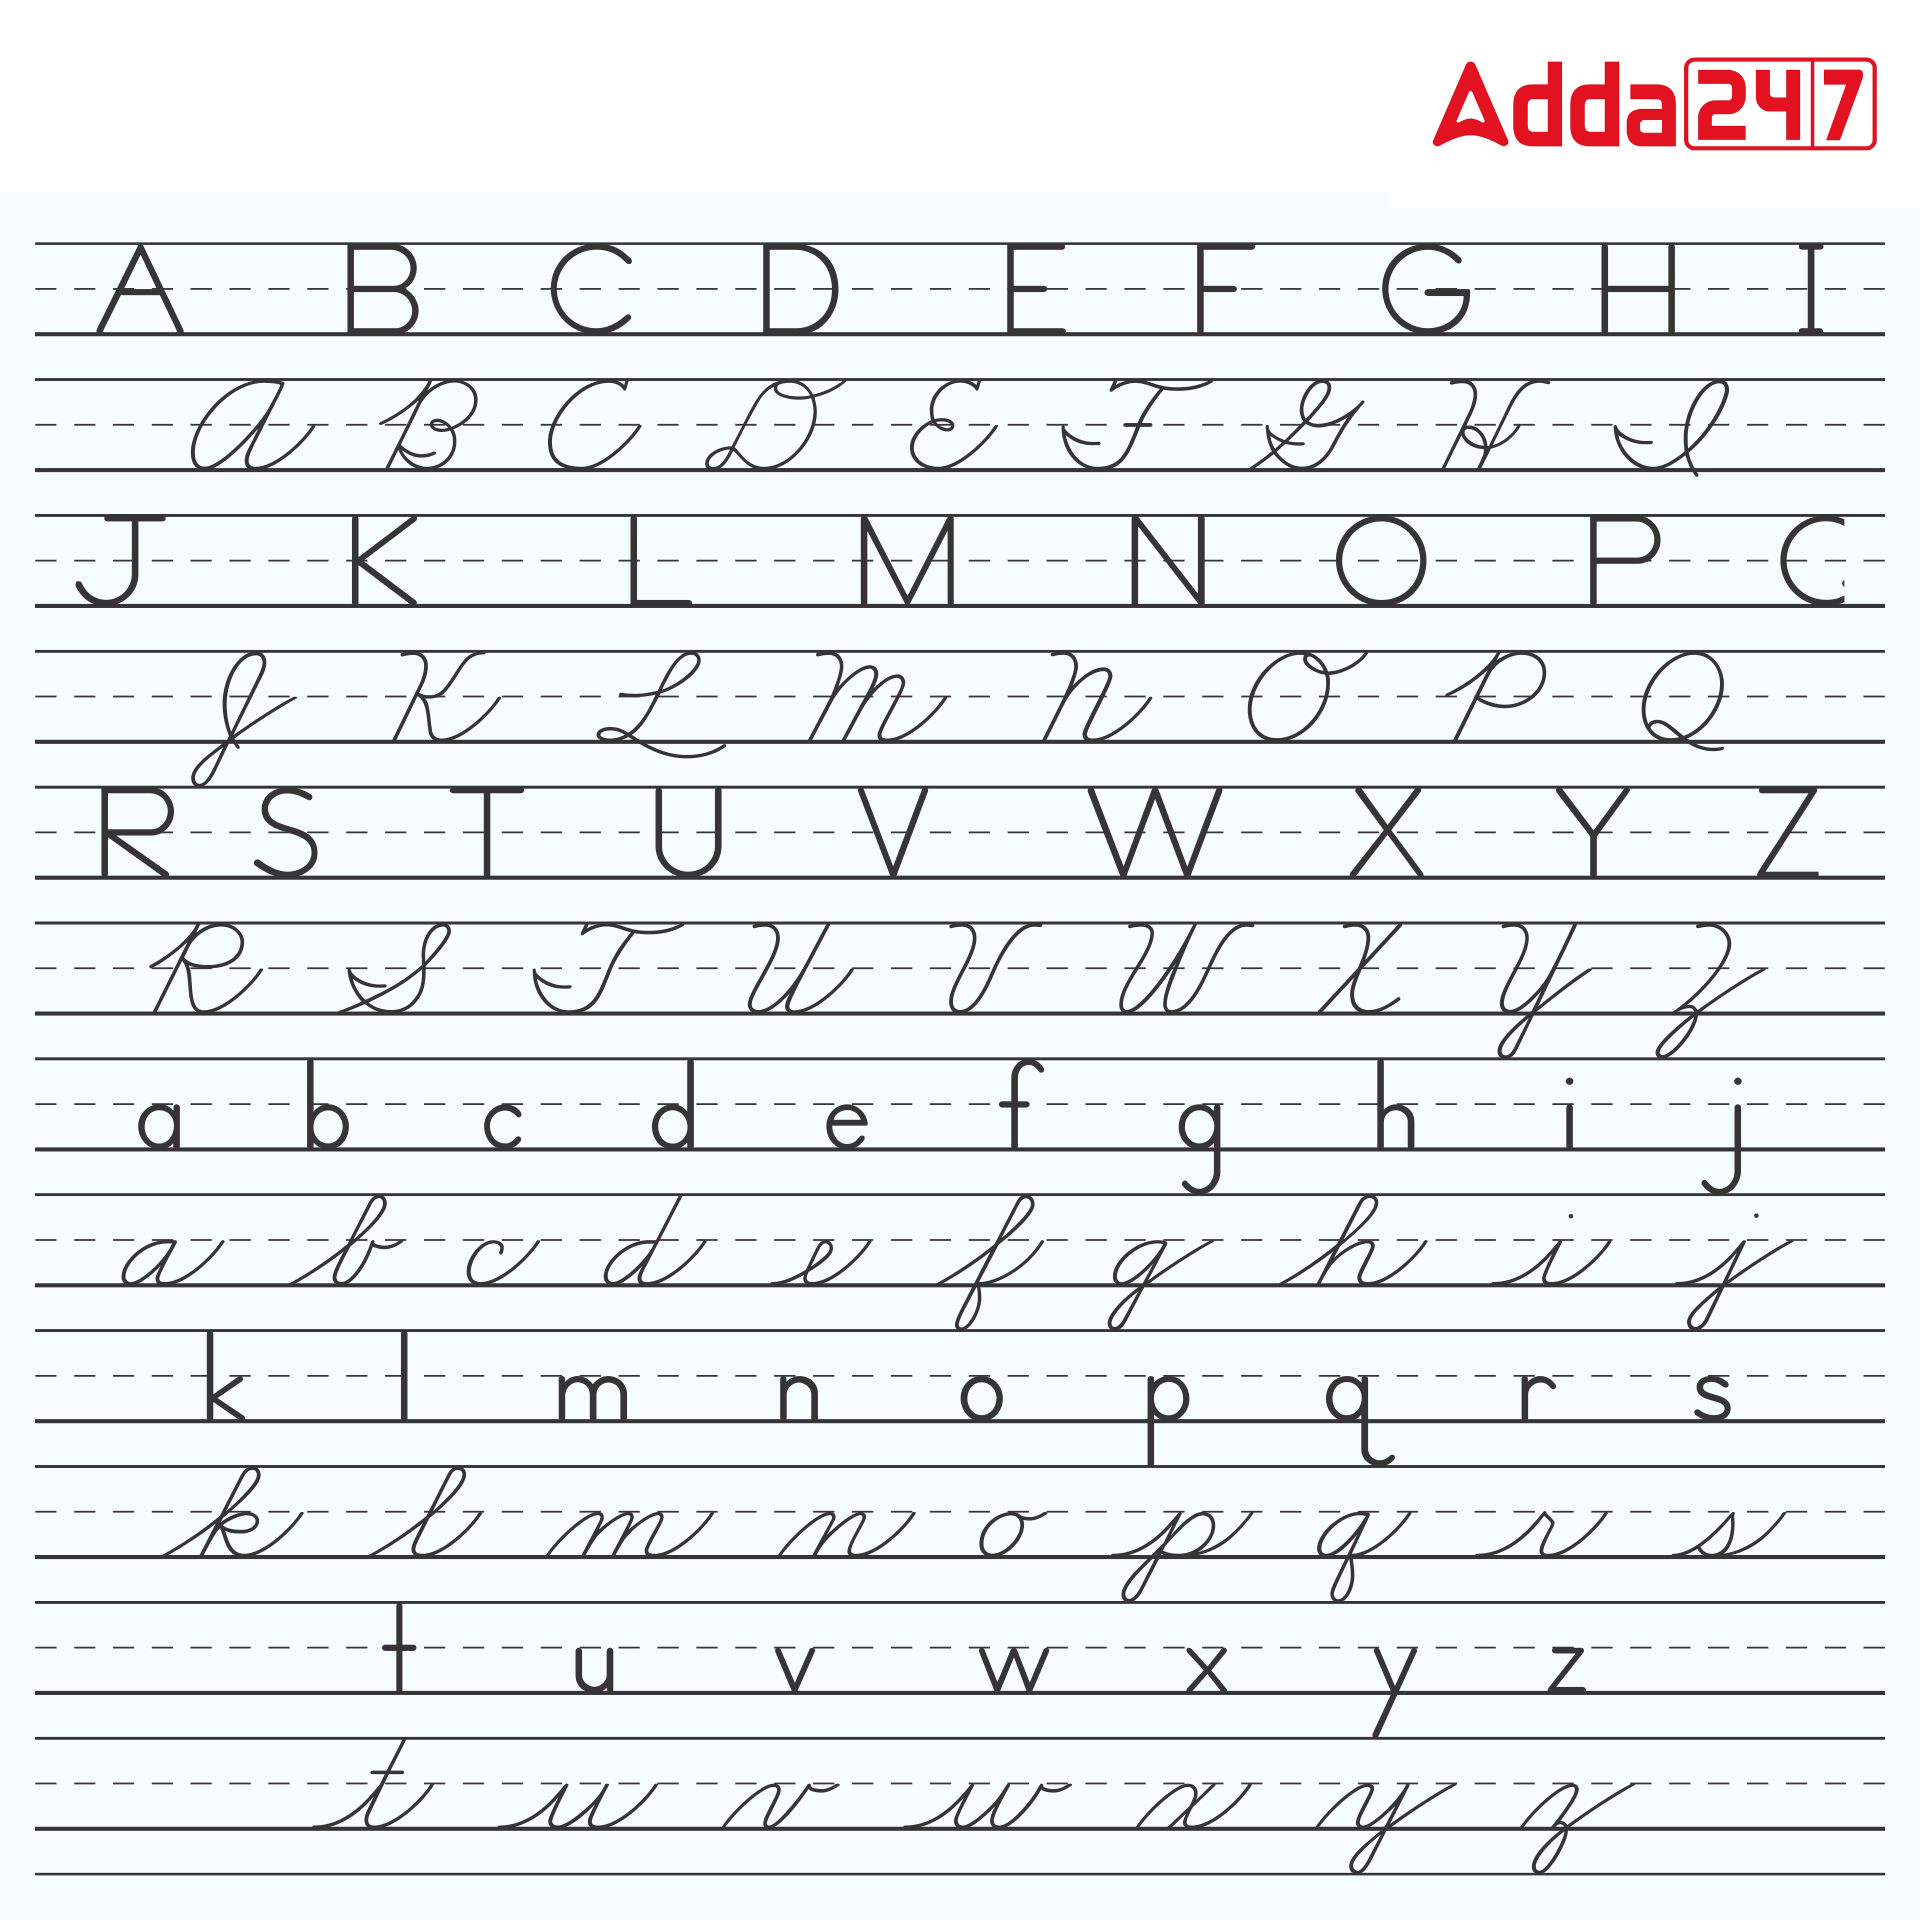
Cursive Writing A to Z in Capital Letters (ABCD)
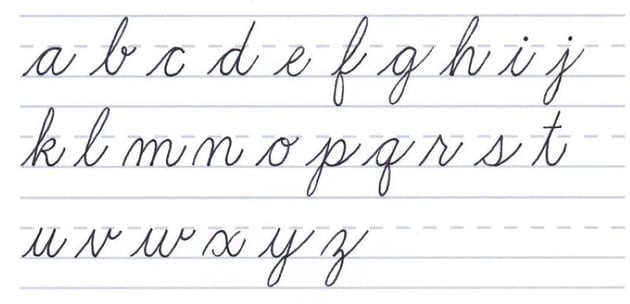
Cursive Writing a to z in Small Letters (abcd)
Cursive Handwriting A to Z Paragraph
Cursive Writing Worksheet
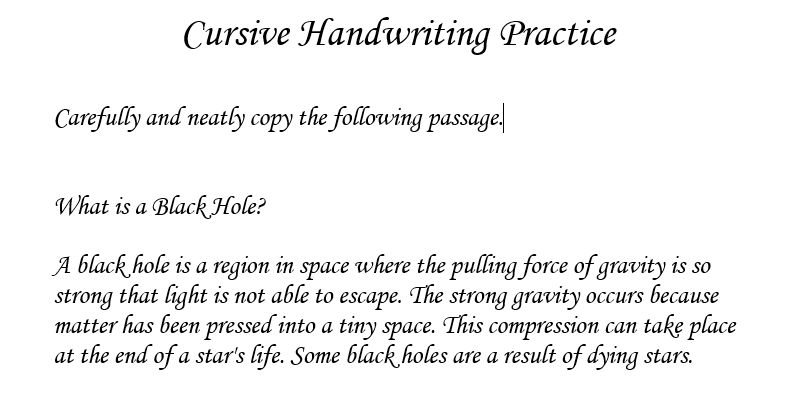
Cursive Letters A to Z Practice Exercise
Carefully write this passage again in cursive handwriting
The festival of lights Diwali has been around for a long time. According to Hindu mythology, Lord Rama returned home to Ayodhya on this day after killing the demon king Ravana. Upon the arrival of their king, the residents of Ayodhya lighted the streets and houses with oil lamps to celebrate the occasion. Since then, the Hindus have been following the tradition by celebrating the festival with pomp and fervor. It is easily the favorite festival for kids as they get to eat their favorite sweets and wear new clothes.
Cursive Writing- QNAs
Q. Why are the cursive letters A to Z important for children?
Ans. Cursive letters A–Z are important for children since they are necessary for learning. Cursive writing instruction and practise are essential components of the educational process for children in today’s tech-based learning environment. Children who practise writing the uppercase A–Z in cursive get good hand grip and hand-eye coordination.
Q. What are the some important tips to keep in mind while writing in cursive?
Ans.
- Download practice writing in cursive. and then recreate the letters by tracing them.
- Try duplicating or tracing capital letters once you’ve mastered lowercase cursive writing.
Q.Why should children practise cursive letter worksheets?
Ans. Children should practise cursive letter worksheets because it develops their handwriting from a young age and assists them in learning spelling. Cursive writing also enhances their motor skills and overall cognitive development.


 Best CUET Coaching in Noida Sector 62 | ...
 Best CUET Coaching in Preet Vihar | Adda...
 Best CUET Offline Classes in Preet Vihar...